Preview Environments using Neon, Kubernetes, and Argo CD
Learn how to create preview environments, each with a unique database branch using Neon, Kubernetes, Argo CD, and GitHub Actions.
Coding in a local development environment provides developers with faster feedback cycles and facilitates the use of their preferred development tools. After completing their coding tasks, developers usually push their code to a source control management platform like GitHub and open a pull request for review. So far so good, but how can QA or a team mate quickly test the changes? Perhaps the pull request’s code is deployed into a shared development or staging environment for testing after code review, or the reviewer needs to set up a test environment manually 😱
Wouldn’t it be better to test the developer’s changes in an isolated production-like environment that’s created automatically in response to the pull request being opened? Using platforms that support serverless paradigms and shared compute make this possible, and cost-effective too.
A prior blog post by Mahmoud discussed the advantages of using preview environments, and how Neon’s database branching feature enables teams to create an isolated production-like database for each of their preview environments. That blog post also included an end-to-end example of how development teams could configure such a setup using Vercel as a hosting and continuous delivery (CD) environment, Neon for serverless Postgres, and GitHub Actions workflows for continuous integration (CI).
This post describes how you can achieve a similar setup using Kubernetes and Argo CD as your hosting and continuous delivery platforms. Two Git repositories will be referenced throughout this post to demonstrate the workflow:
- Source code repository – Contains a Next.js application that uses Prisma.
- Configuration repository – Contains Kubernetes and Argo CD manifests.
Neon’s Database Branching Capabilities
Let’s review Neon’s database branching feature before diving into the demo application and preview environment configuration.
Neon enables you to create copies of your project’s Postgres cluster, where each copy is completely isolated from the other. We refer to this copying process as “branching” and call each copy a “branch”. Branches are created using copy-on-write, making it fast and cost-effective.
Each Neon project is created with a root branch called main. The first branch that you create is branched from the project’s root branch. Subsequent branches can be branched from the root branch or from a previously created branch.

Creating a branch does not increase load on the parent branch or affect it in any way, which means you can create a branch without impacting the performance of your production system. And since Neon’s serverless Postgres scales to zero when not in-use, it provides a cost-effective mechanism for creating isolated database environments for feature development and testing.
Setup the Next.js Application and a Neon Project
Fork the source code repository, clone it locally, install the dependencies, and create a copy of the .env.example file named .env:
git clone git@github.com:$YOUR_GH_USERNAME/kube-previews-application.git

cd kube-previews-application

npm install

cp .env.example .env
Next, create a Neon project using npx neonctl projects create (you’ll be prompted to sign up if you’re a first time user), or access an existing project from the Neon console and take note of the Connection Details for the neondb on your main database branch.
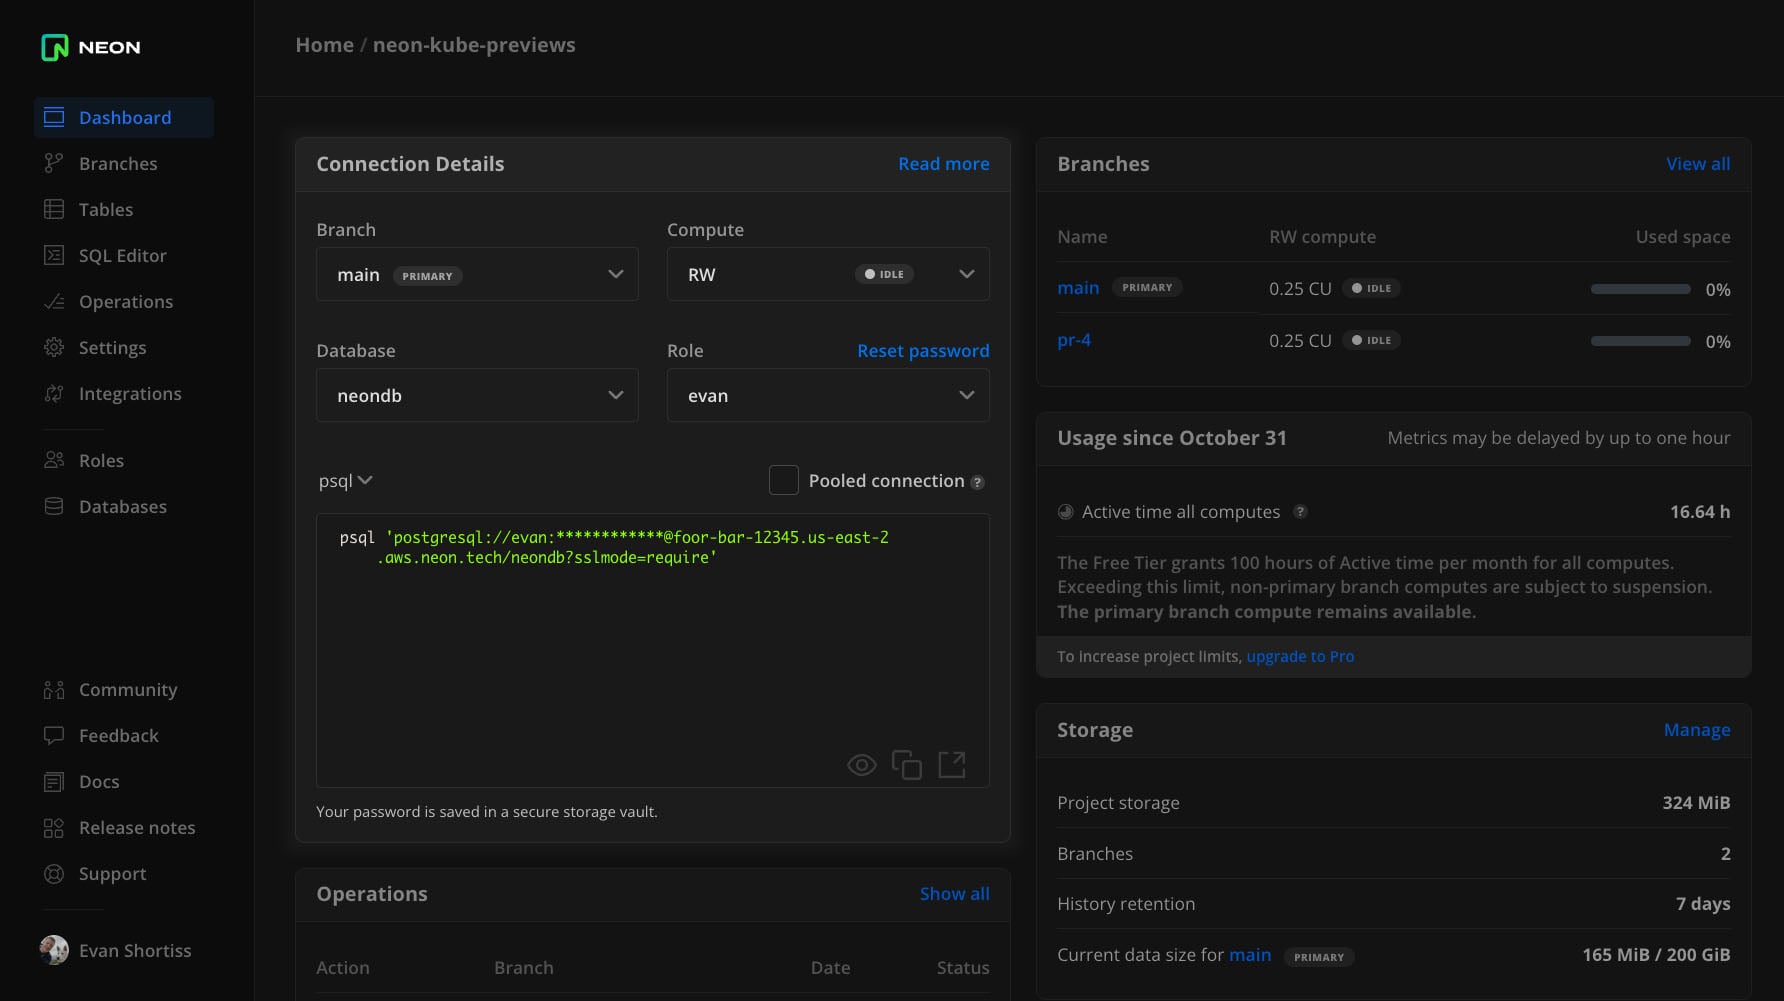
Update the .env file with the values found in the Connection Details panel from the Neon console, then run the setup script to seed the database using Prisma:
npm run setupFinally, start the application in development mode and verify that it can connect to the database:
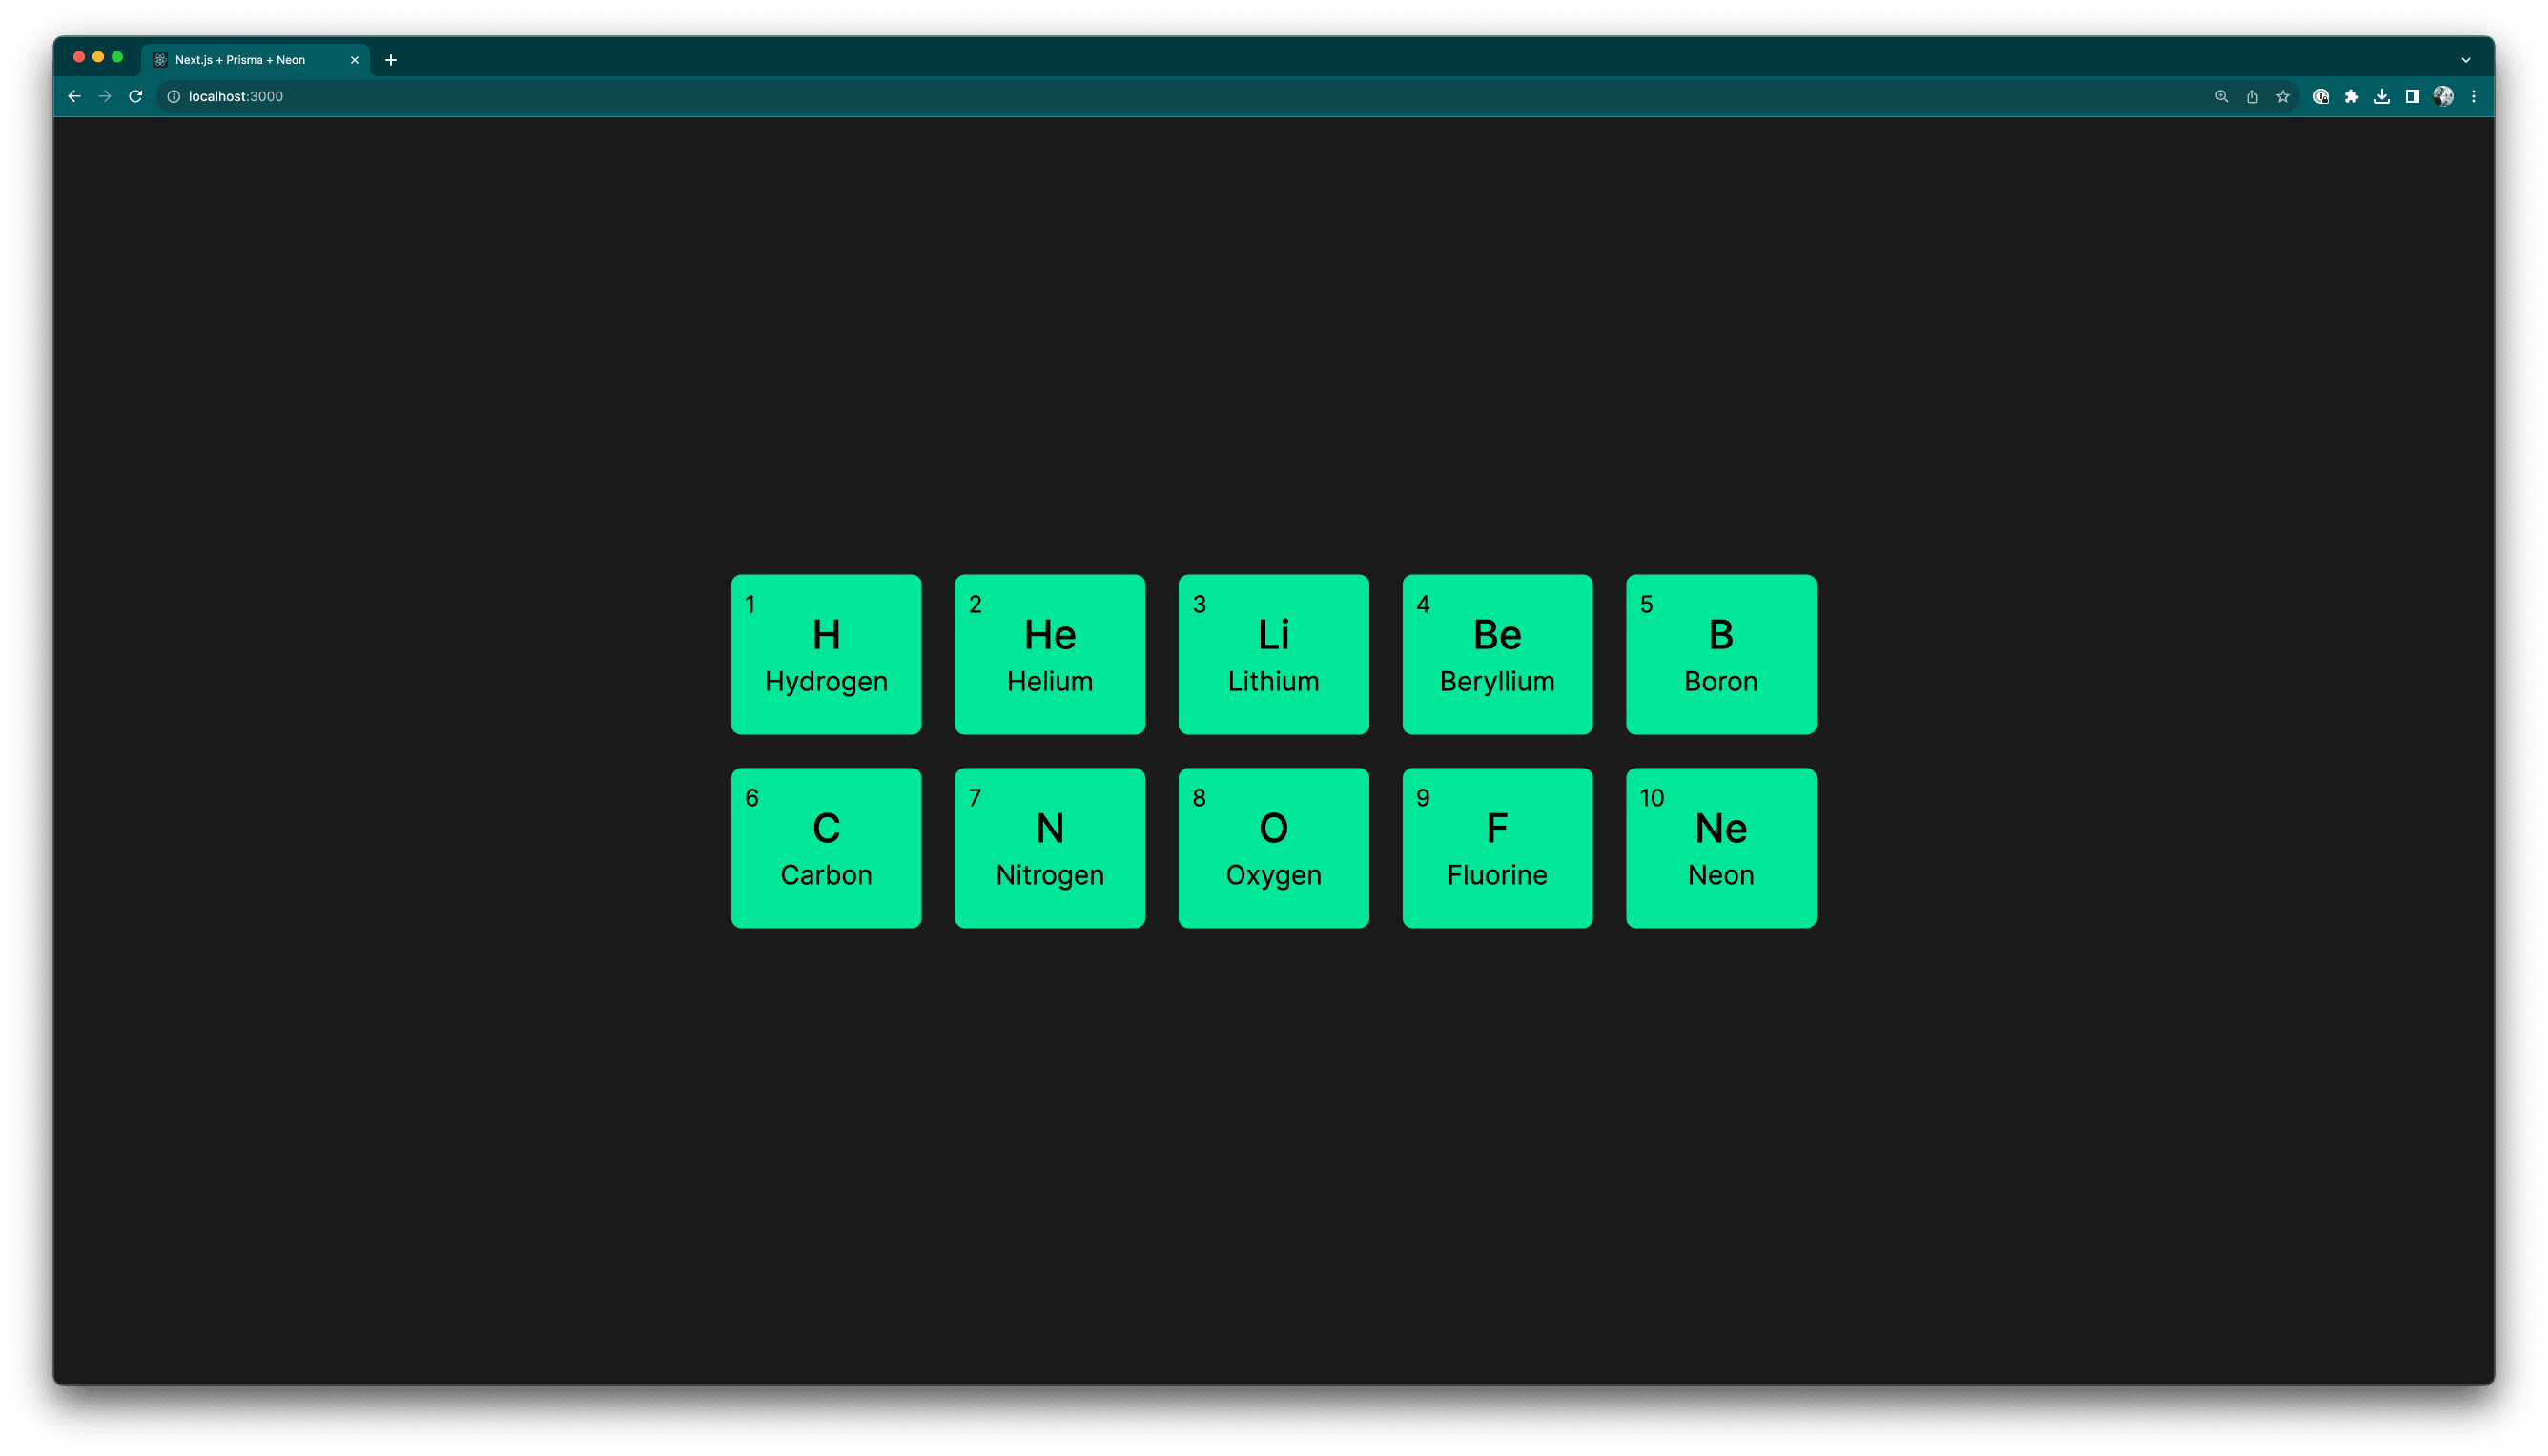
npm run devVisit http://localhost:3000/ to see a list of elements that are fetched from your Neon database:
Neon Database Branching in Action
A main database branch was created when you created your Neon project. Create a new branch named dev, and create a read/write compute to interact with it:
- Visit the Branches page for your project in the Neon console, and click the New Branch button.
- Configure the following settings for your new branch:
- Name:
dev - Parent:
main - Create from:
head - Compute: Create compute
- Name:
- Click Create a branch.
Creating a compute for the new branch is necessary if you’d like to connect and write data to it. It’s possible to create separate read-only compute endpoints for each branch too. Neon is serverless by default, meaning compute scales to zero after being idle for 5 minutes. The compute will scale up again when a query is received.
Delete some elements from your new dev branch:
- Visit the SQL Editor in the Neon console.
- Choose the
devbranch from the drop down in the top-right. - Run the following query:
DELETE from "Element" WHERE "atomicNumber" <= 5;. - Verify that only elements with an atomic number greater than 5 remain:
SELECT * from "Element";
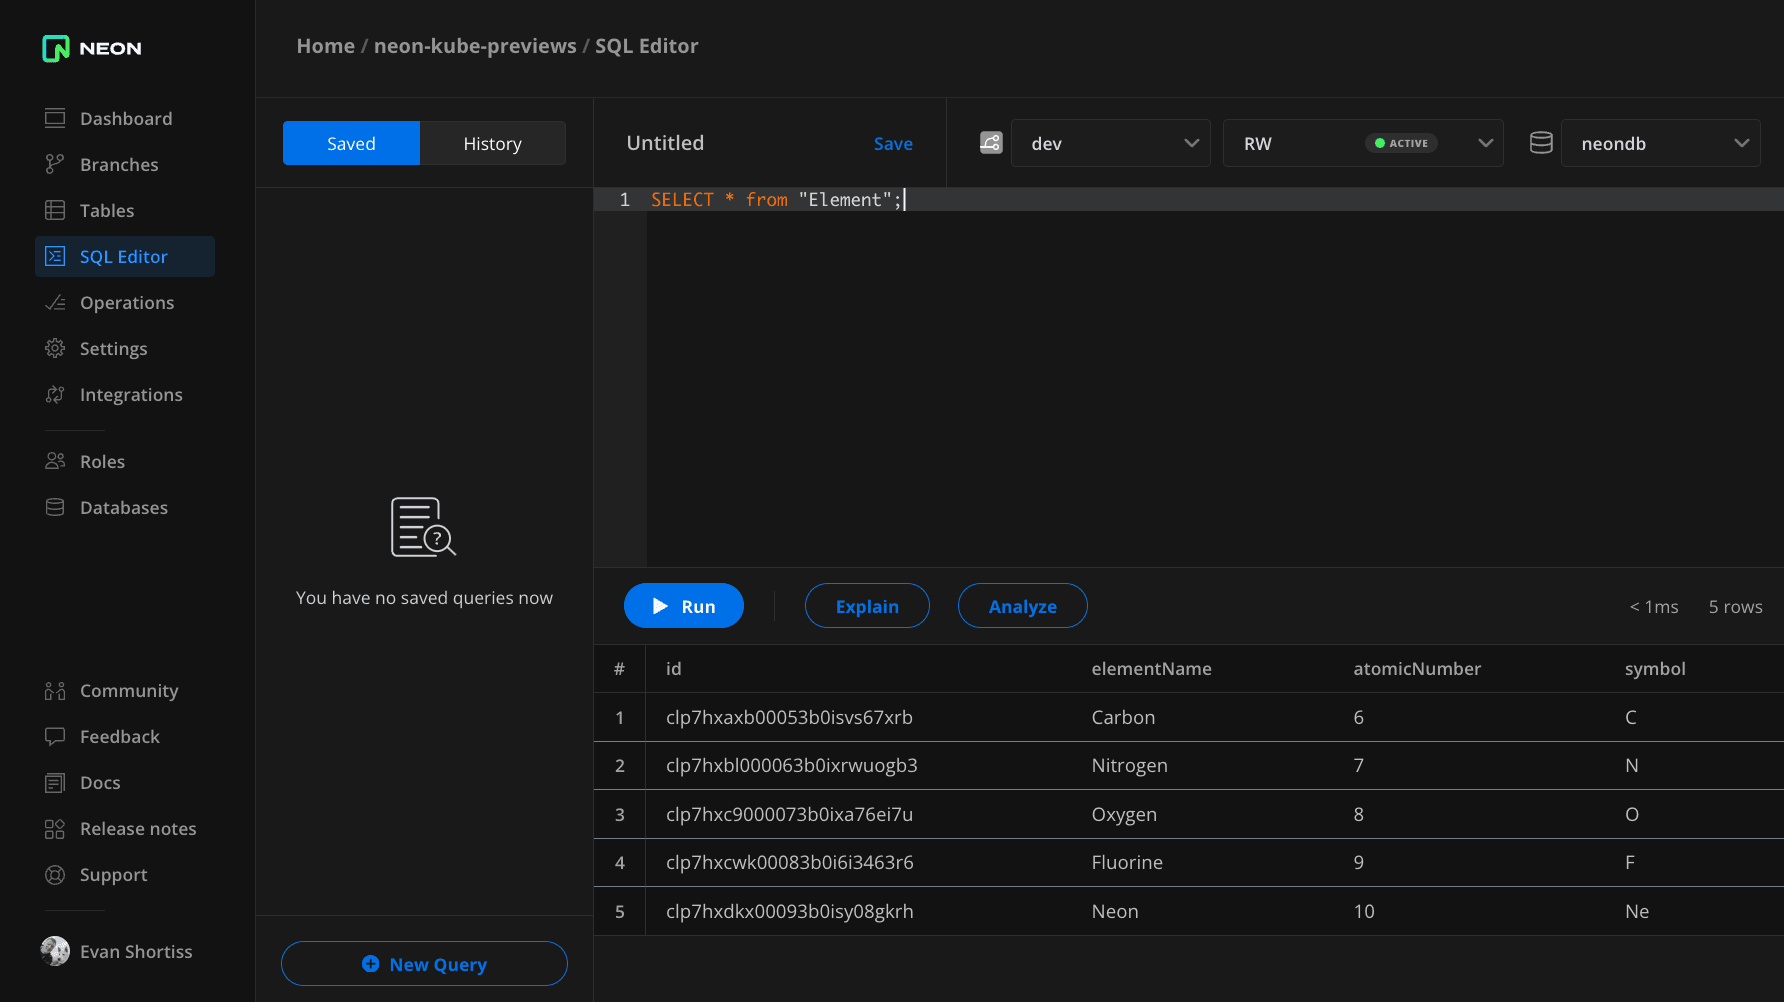
Refresh the Next.js application in your local development environment. All the elements should still be there. This is because your local development environment is connected to the main branch. If you replace the connection string values in the .env file to connect to a compute associated with the dev branch fewer elements would be rendered.
Continuous Delivery of Preview Environments using Argo CD
Kubernetes enables organisations to create scalable compute clusters that are composed of multiple physical or virtual machines that can run containerised workloads. These workloads are logically isolated using namespaces. Argo CD is a GitOps continuous delivery tool for Kubernetes that’s designed to support the declarative nature of Kubernetes-based applications.
Put plainly, Argo CD automates application deployment on Kubernetes clusters based on configurations – typically defined as manifests in YAML format – that are stored in a Git repository. Argo CD keeps the deployment on the cluster in sync with the desired state defined by the manifests the Git repository.
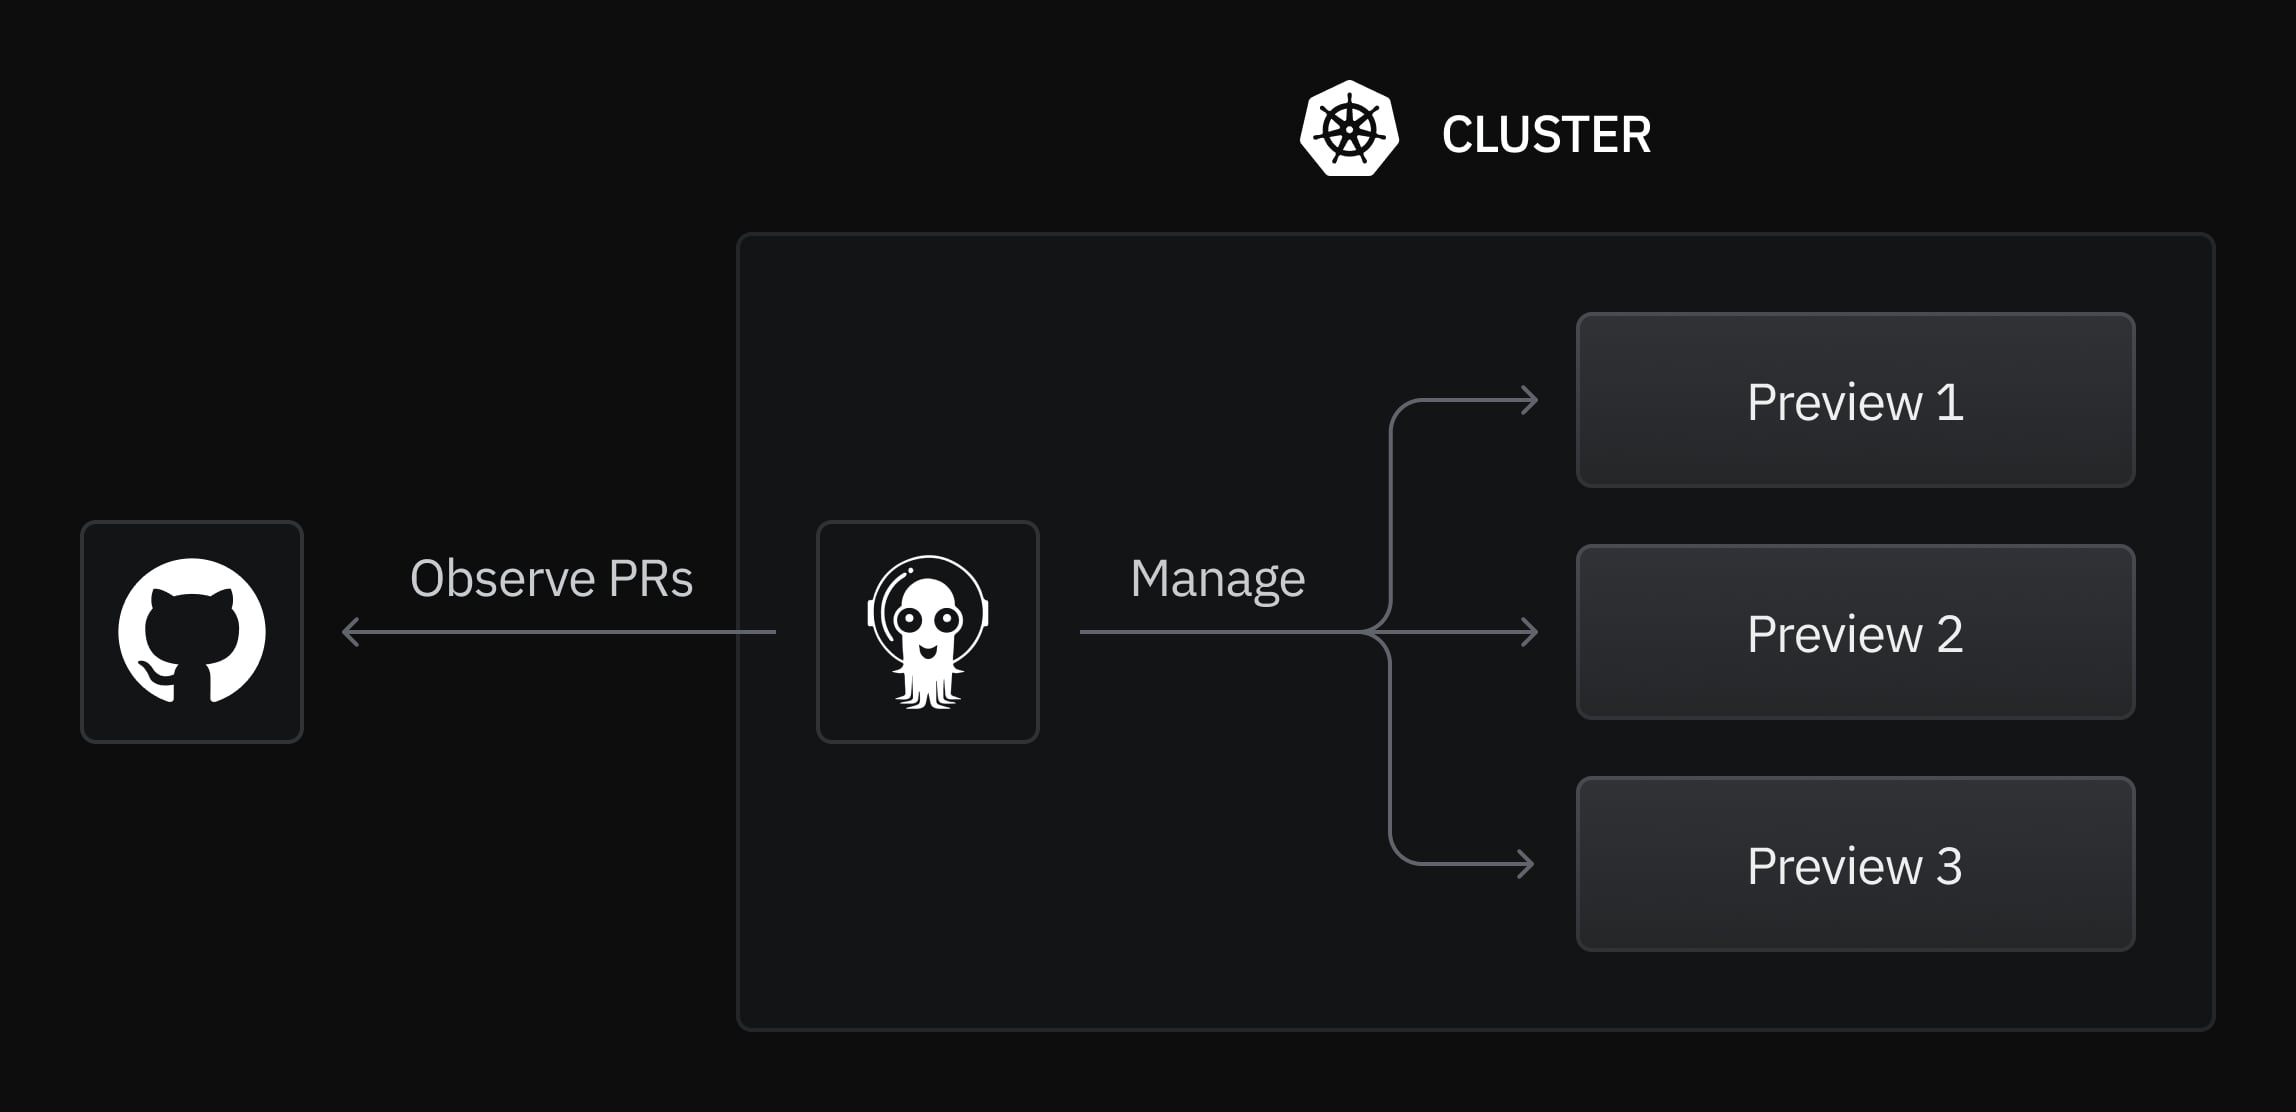
Argo CD uses an abstraction known as an Application to manage a set of Kubernetes resources in a specific namespace that comprise – you guessed it – an application. A further abstraction known as the ApplicationSet can be used to create a new Application in response to each pull request in a Git repository – perfect for creating preview environments.
The following ApplicationSet is used to create preview environments for each pull request against the application source code repository. It can be found in the manifest repository associated with this post.
apiVersion: argoproj.io/v1alpha1
kind: ApplicationSet
metadata:
  name: nkp-previews
  namespace: argocd
spec:
  generators:
  - pullRequest:
      requeueAfterSeconds: 60
      github:
        owner: neondatabase
        repo: kube-previews-application
  template:
    metadata:
      name: 'nkp-pr-{{number}}'
    spec:
      source:
        repoURL: 'https://github.com/neondatabase/kube-previews-manifests'
        path: helm/
        targetRevision: main
        helm:
          valueFiles:
          - values.dev.yaml
          values: |
            ingress:
              domain: pr-{{number}}.nkp.ngrok.app
      project: default
      syncPolicy:
        automated:
          prune: true
          selfHeal: true
        syncOptions:
          - CreateNamespace=true
      destination:
        server: https://kubernetes.default.svc
        namespace: 'nkp-pr-{{number}}'
To summarise, this YAML defines an ApplicationSet resource that instructs Argo CD to:
- Check the neondatabase/kube-previews-application repository on GitHub every 60 seconds.
- Generate a new Argo CD Application using the given
template, for each open pull request. - Deploy the application on the same Kubernetes cluster that Argo CD is running on using the manifests in the neondatabase/kube-previews-manifests repository.
The {{number}} reference is a variable that represents the GitHub pull request number. This value is used to create a unique namespace and preview URL for the Application.
You might be wondering why different GitHub repositories are referenced by the template and generators sections of the ApplicationSet. The reason for this is that it’s a best practice (per Argo CD) to keep source code separate from deployment manifests and configurations.
Applying the ApplicationSet to a cluster that has Argo CD installed on it will result in a new Application being created for each pull request, as shown.
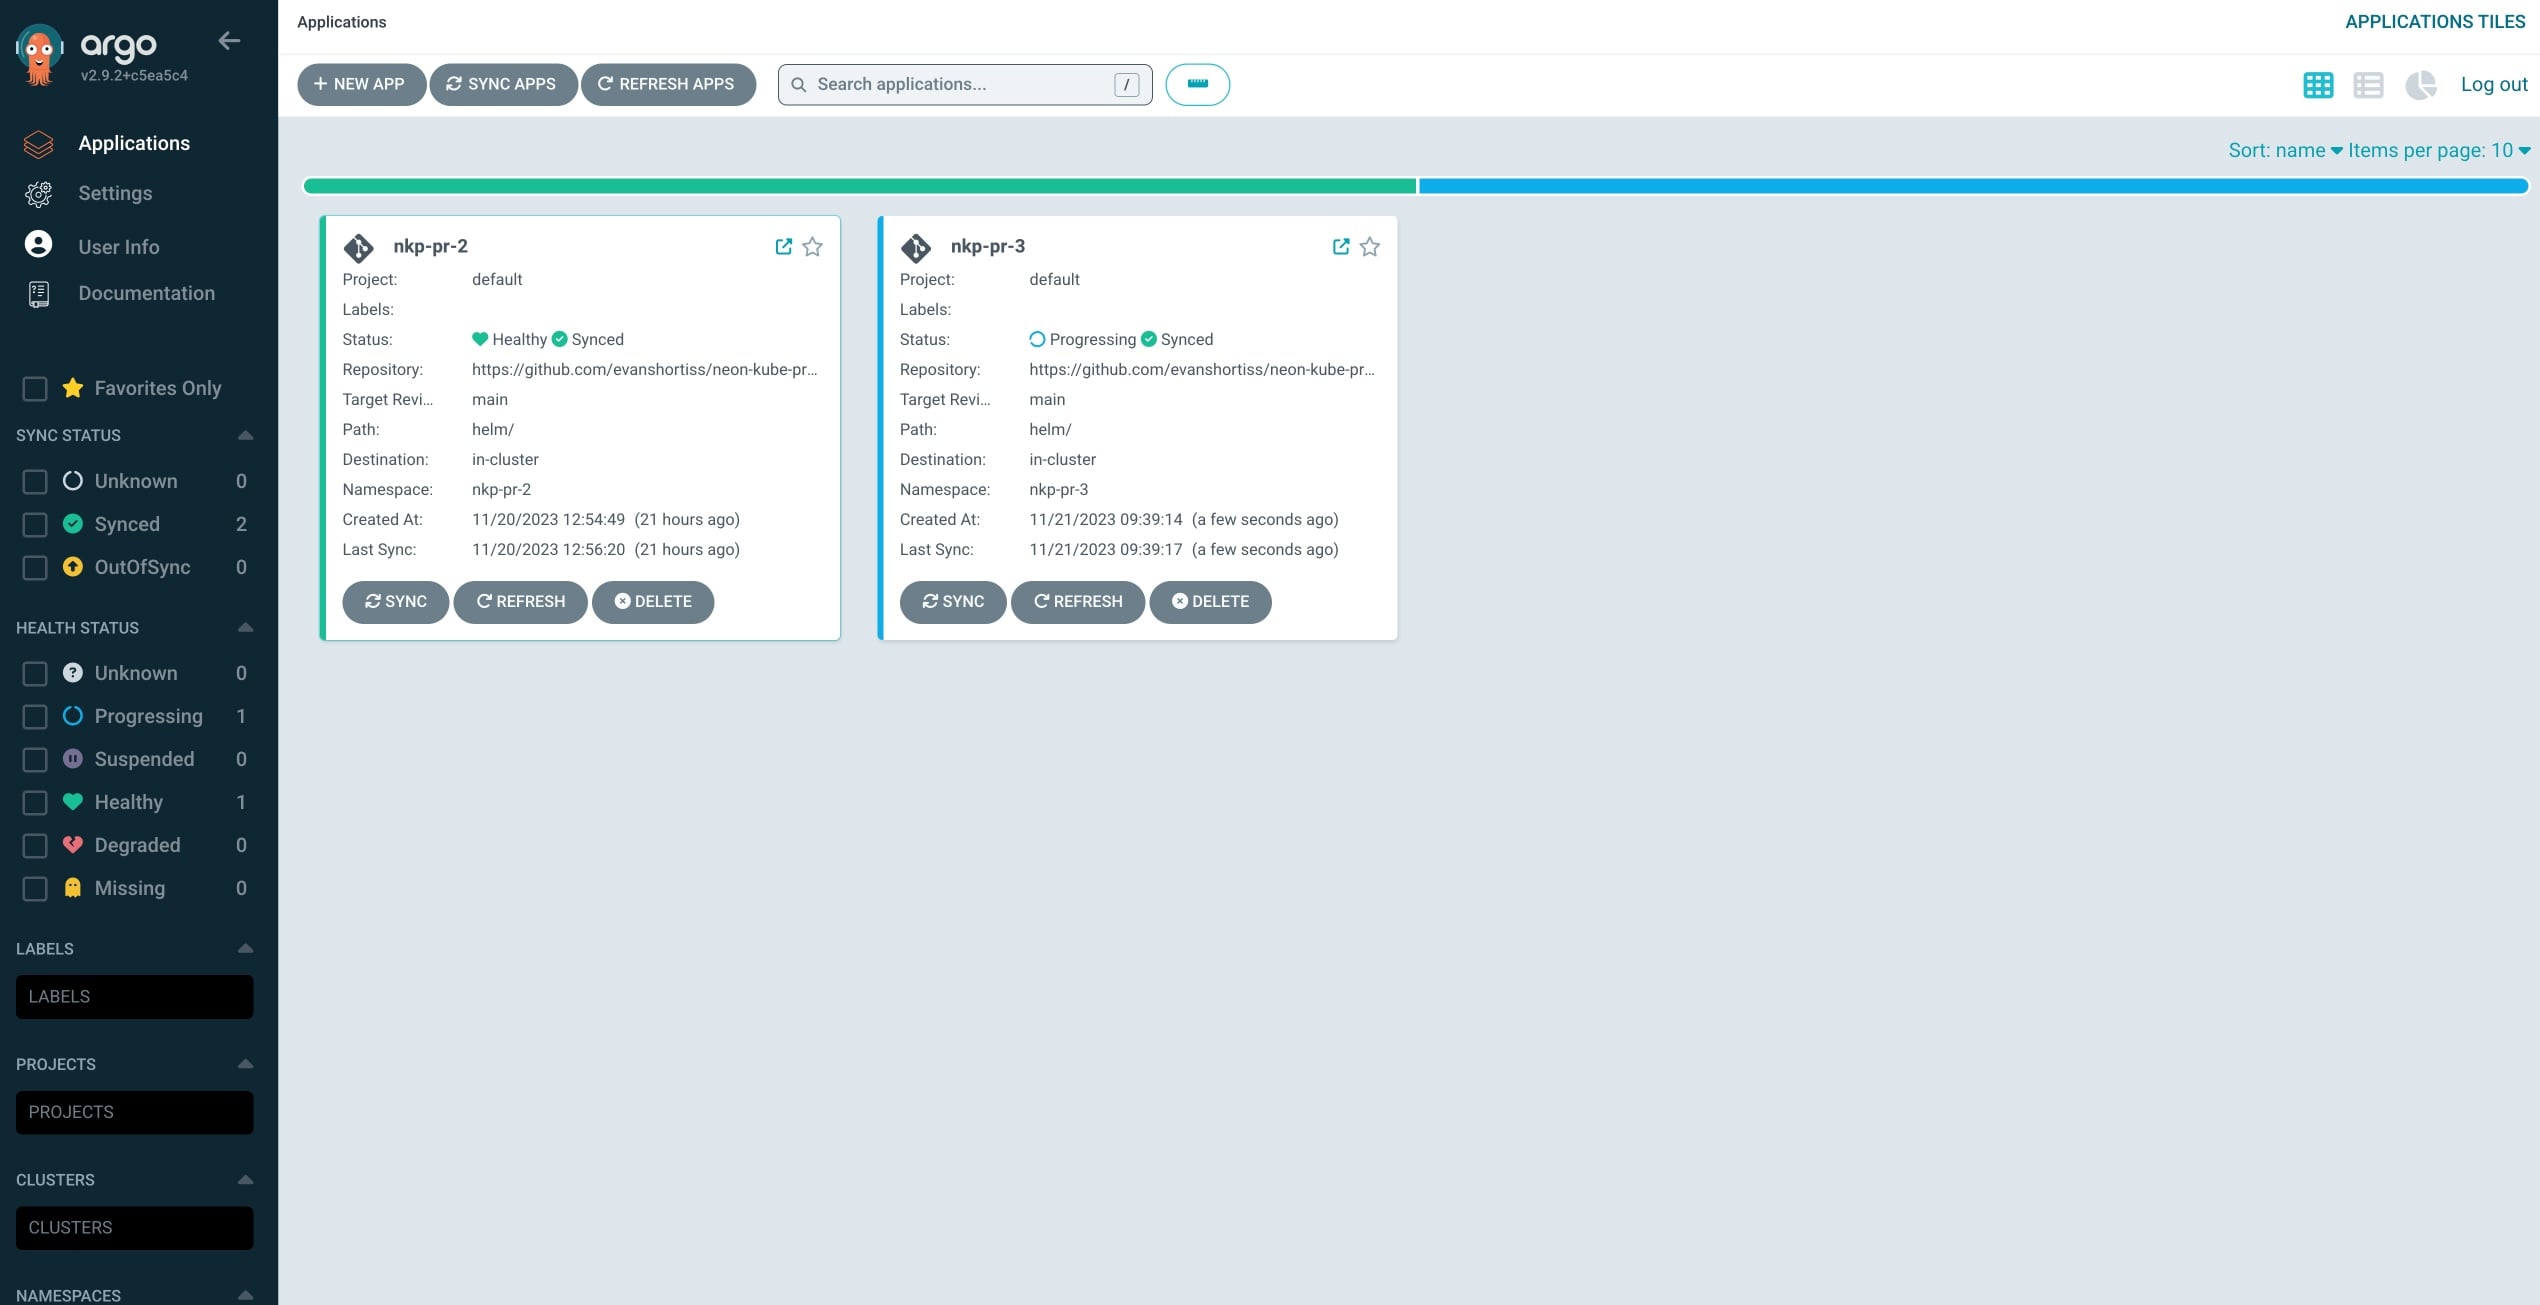
To test this setup for yourself using an Argo CD instance in a local Kubernetes environment, take a look at this README in the manifest repository.
Continuous Integration and Neon Branching using GitHub Actions
Each preview environment requires the creation of a new container image that contains (pun intended) the developer’s latest code changes, and a unique Neon Postgres branch with a compute endpoint. The lifecycle of the container image and Neon resources are managed using a GitHub Actions workflow in the pr-build-and-preview.yaml file. This workflow:
- Performs a container image build, and pushes the resulting container image to a container registry.
- Creates a Neon database branch and compute using Neon’s create-branch-action.
- Updates the parameters of the Argo CD Application associated with the pull request with:
- The connection string for the Neon compute associated with the branch.
- The tag for the container image associated with the latest commit.
- Comments on the pull request with a link to the Argo CD environment and a preview URL.
Some secrets must be configured to successfully run this workflow:
DOCKERHUB_TOKEN– A token with read/write access to a repository on Docker Hub.DOCKERHUB_USERNAME– The username associated with theDOCKERHUB_TOKEN.NEON_API_KEY– A Neon API key. Used to create a branch and compute endpoint.NEON_PROJECT_ID– The ID of your Neon project.ARGOCD_HOSTNAME– Publicly accessible hostname of your Argo CD instance.ARGOCD_USERNAME– A valid Argo CD username.ARGOCD_PASSWORD– The password associated with the givenARGOCD_USERNAME.PREVIEW_SUBDOMAIN– The subdomain that hosts preview environments, e.gneon.ngrok.app. This will be used to form a full preview environment URL, i.ehttps://pr-1.${PREVIEW_SUBDOMAIN}
The full workflow definition is included below:
name: Build Container Image and Preview Environment

on:
  workflow_dispatch:
  pull_request:
    branches:
      - '*'

jobs:
  build-container:
    # Removed for brevity. This section simply runs “docker build”
    # followed by “docker push” using docker/build-push-action

  create-preview-environment:
    runs-on: ubuntu-latest
    needs: build-container
    permissions:
      # To comment on the PR with a preview URL
      pull-requests: write

    steps:
    - name: Create Neon Branch and Compute for PR
      id: create-branch
      uses: neondatabase/create-branch-action@v4
      with:
        api_key: ${{ secrets.NEON_API_KEY }}
        project_id: ${{ secrets.NEON_PROJECT_ID }}
        branch_name: pr-${{ github.event.number }}
        parent: main

    - name: Install the Argo CD CLI
      run: |
        curl -sSL -o argocd-linux-amd64 https://github.com/argoproj/argo-cd/releases/download/v2.8.4/argocd-linux-amd64
        sudo install -m 555 argocd-linux-amd64 /usr/local/bin/argocd

    - name: Login to Argo CD
      run: argocd login ${{ secrets.ARGOCD_HOSTNAME }} --username ${{ secrets.ARGOCD_USERNAME }} --password ${{ secrets.ARGOCD_PASSWORD }}

    - name: Update the Preview Environment with the Neon Branch URL
      run: |
        argocd app set nkp-pr-${{github.event.number}} \
        --parameter database.url=${{ steps.create-branch.outputs.db_url }} \
        --parameter deployment.image.tag=${{ github.event.pull_request.head.sha }}

    - name: Comment on Pull Request
      uses: thollander/actions-comment-pull-request@v2
      with:
        message: |
          :rocket: Preview URL: https://pr-${{github.event.number}}.${{ secrets.PREVIEW_SUBDOMAIN }}
          :octopus: Argo CD URL: https://${{ secrets.ARGOCD_HOSTNAME }}/applications/argocd/nkp-pr-${{github.event.number}}
        comment_tag: preview-url
Avid GitOps practitioners might feel that setting the container image tag and database connection string imperatively is an anti-pattern, but sometimes it’s necessary to sacrifice strict adherence to GitOps principles when certain dependencies cannot be satisfied declaratively. The Argo CD documentation acknowledges this reality. This won’t be an issue in the production environment where the database connection string and container image tag are known ahead of time.
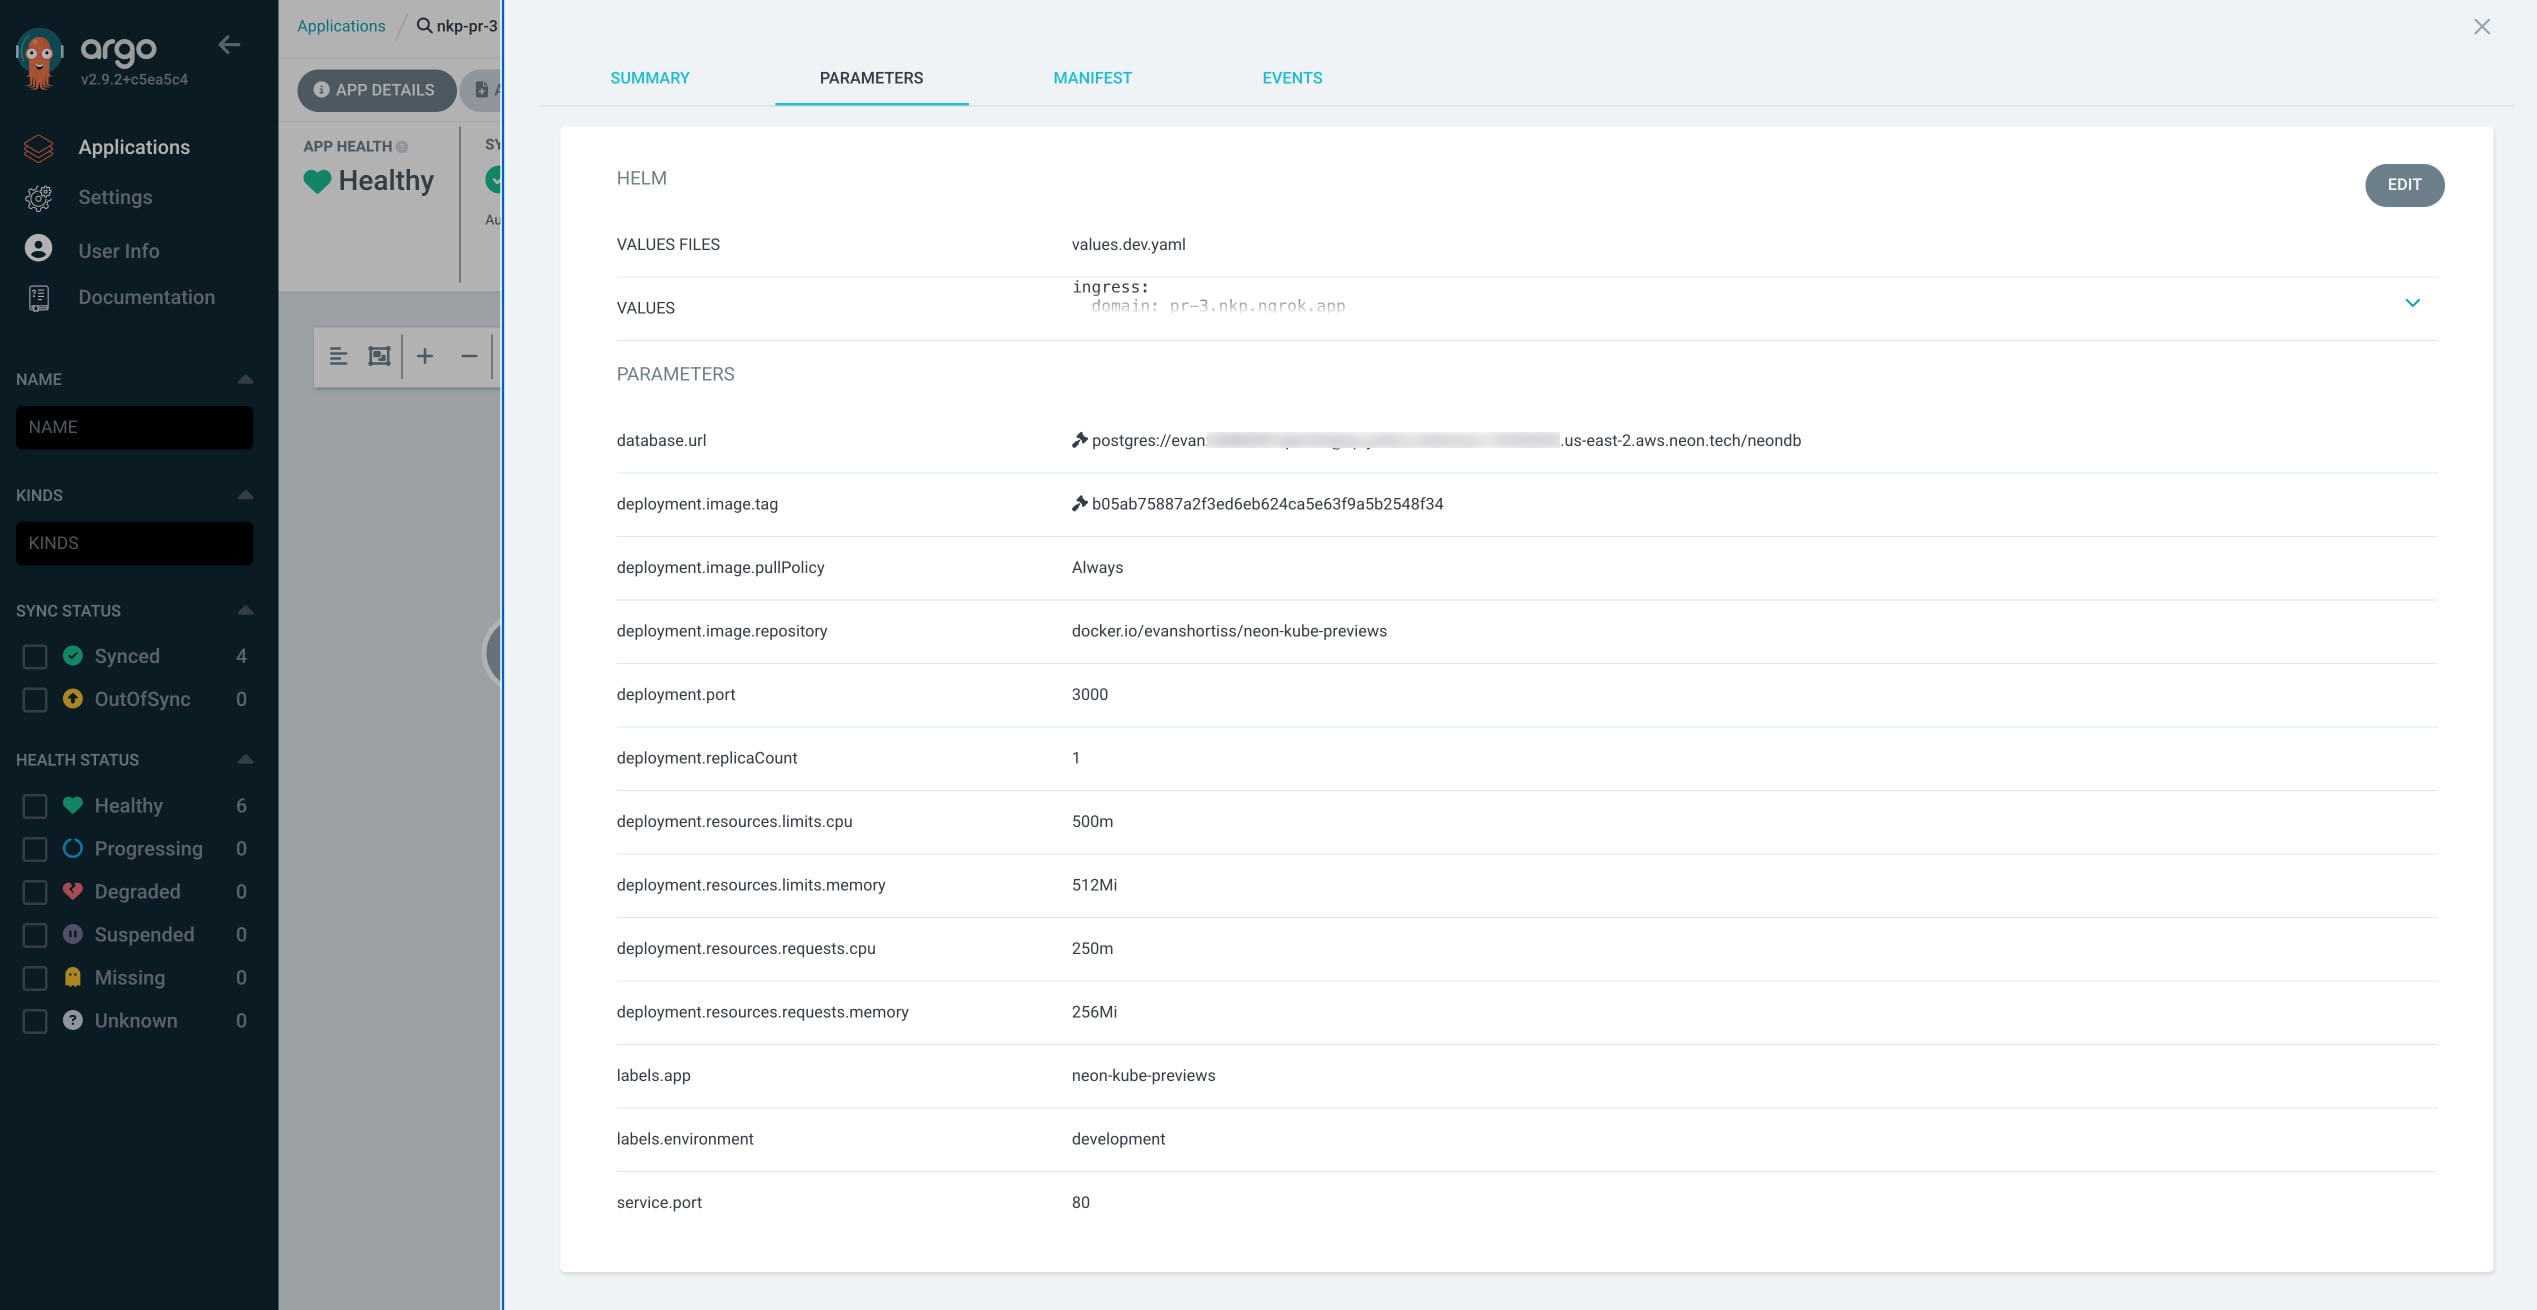
Once the workflow has completed the Argo CD Application will be updated with the new container image tag and database URL parameters.
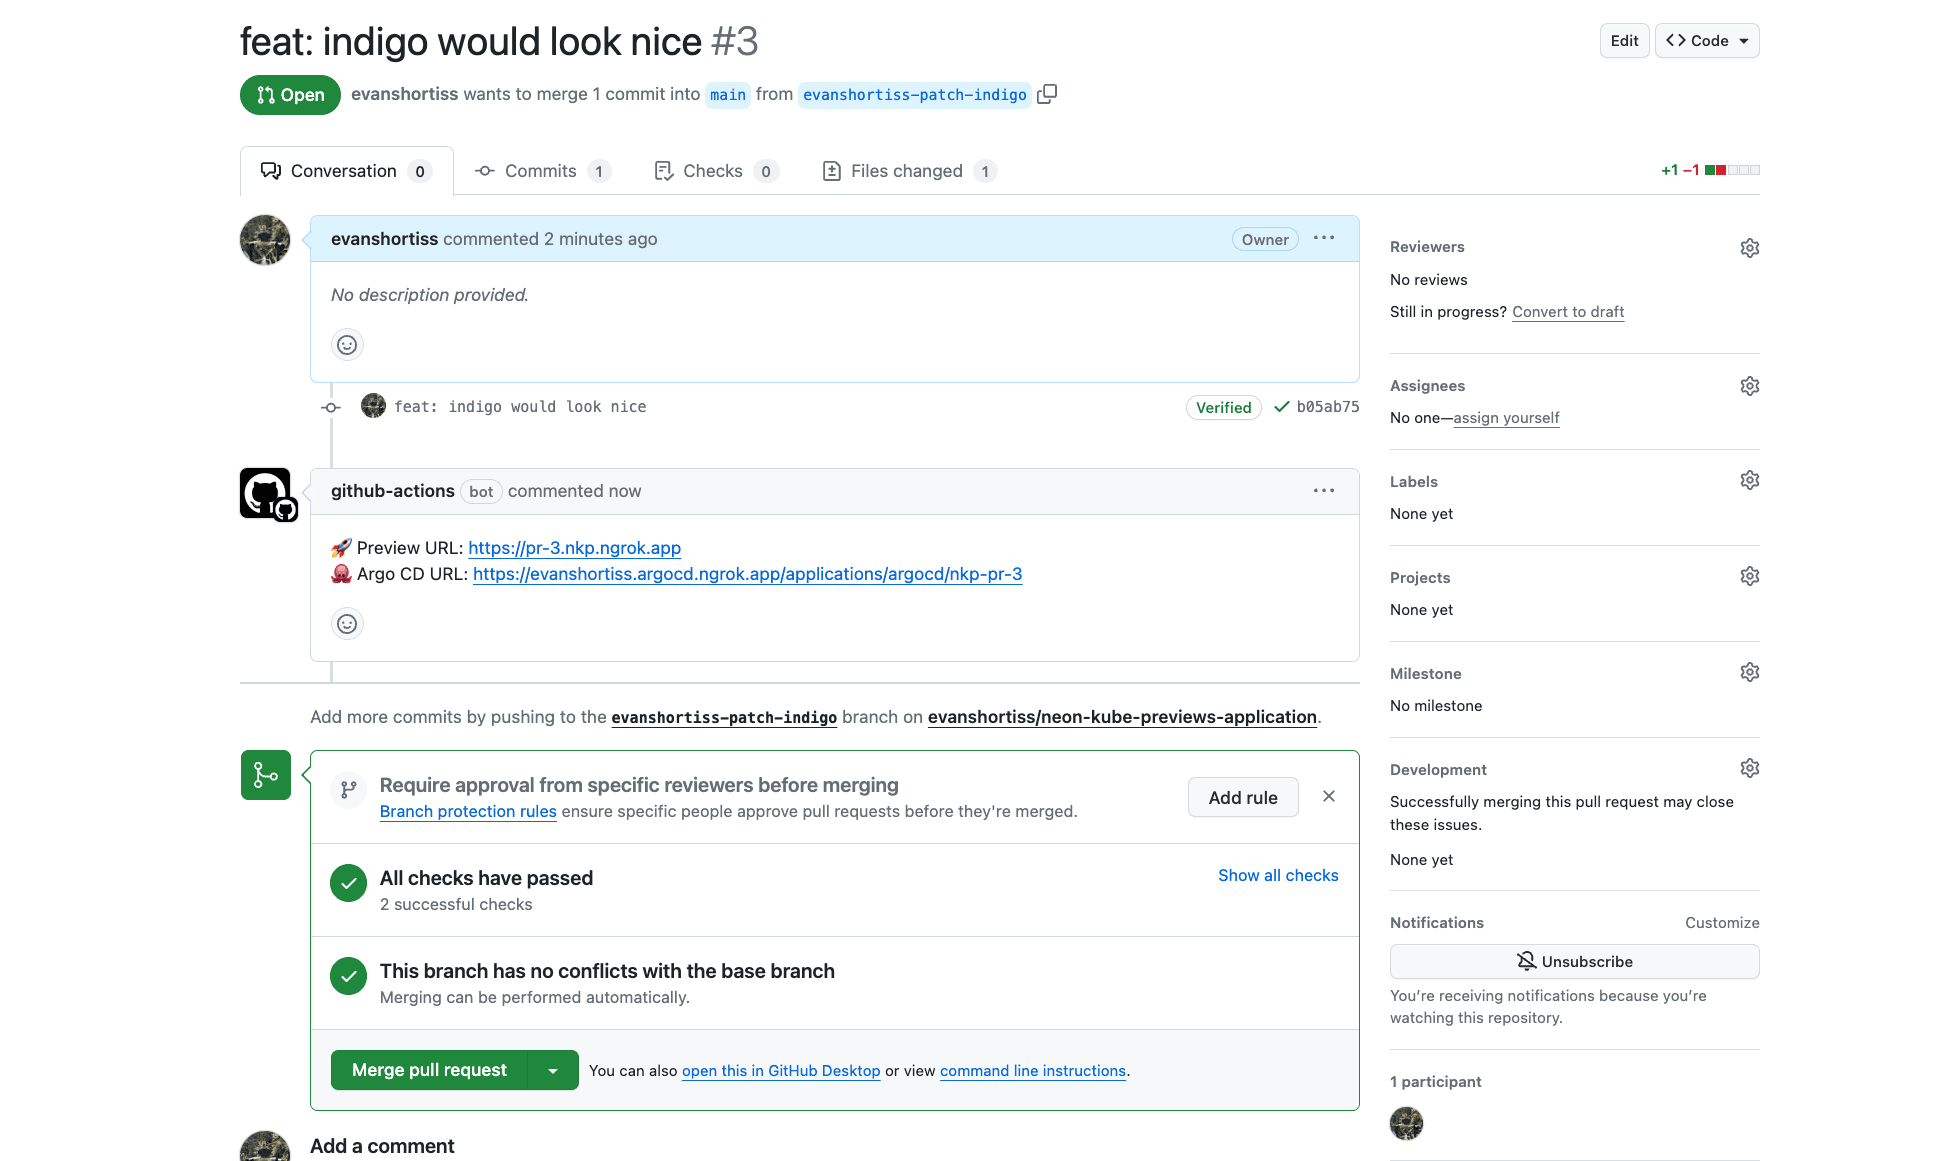
The pull request will also have a comment linking to the preview environment that’s running a copy of the pull request’s code and is connected to the unique Neon branch that was created specifically for the preview environment.
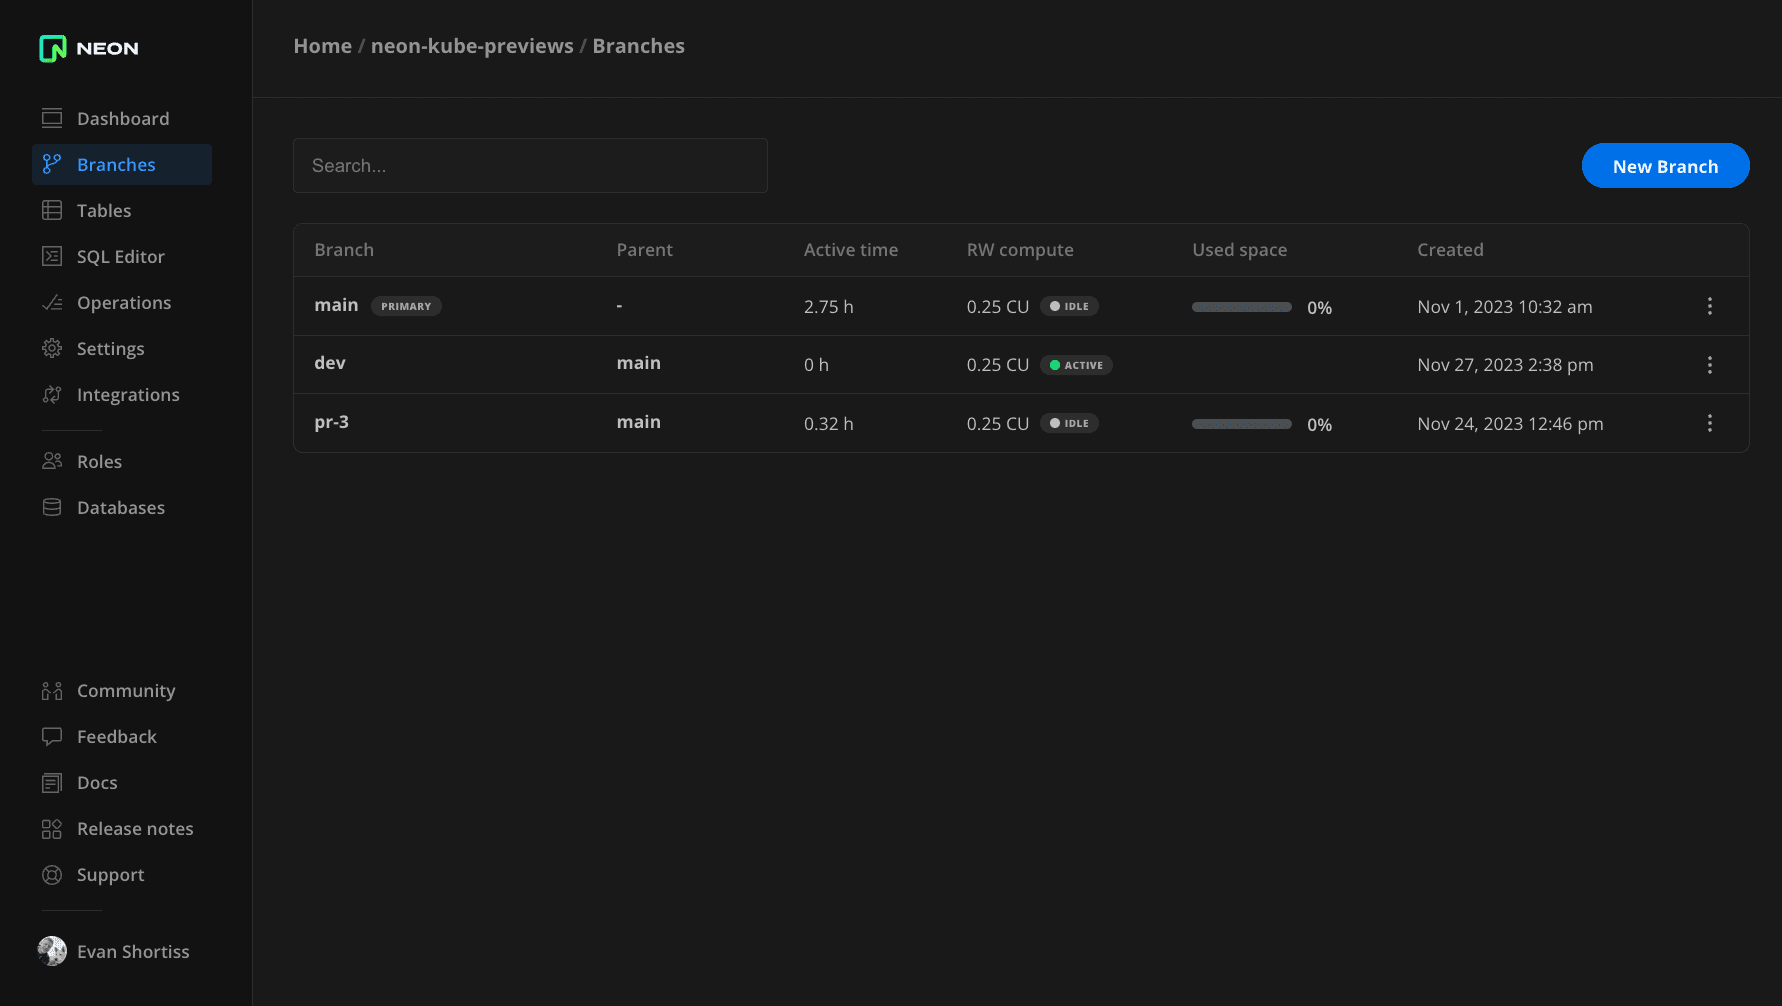
The Neon branch associated with the pull request will also be visible in the Neon console, on the Branches page.
Conclusion
You’re now equipped with a deeper understanding of Neon’s branching and compute structure, and how it can be used to create isolated preview environments on a Kubernetes cluster in concert with Argo CD and GitHub Actions.
This solution is an example, and is not meant to be overly prescriptive. Argo CD and GitHub Actions could be replaced by your preferred CI/CD tooling. If there are other deployment providers or CI/CD tools you would like us to cover, feel free to reach out to us in our community forum. If you want to try out this flow on Neon, you can sign up today for free. No credit card required.


